Managing Categories
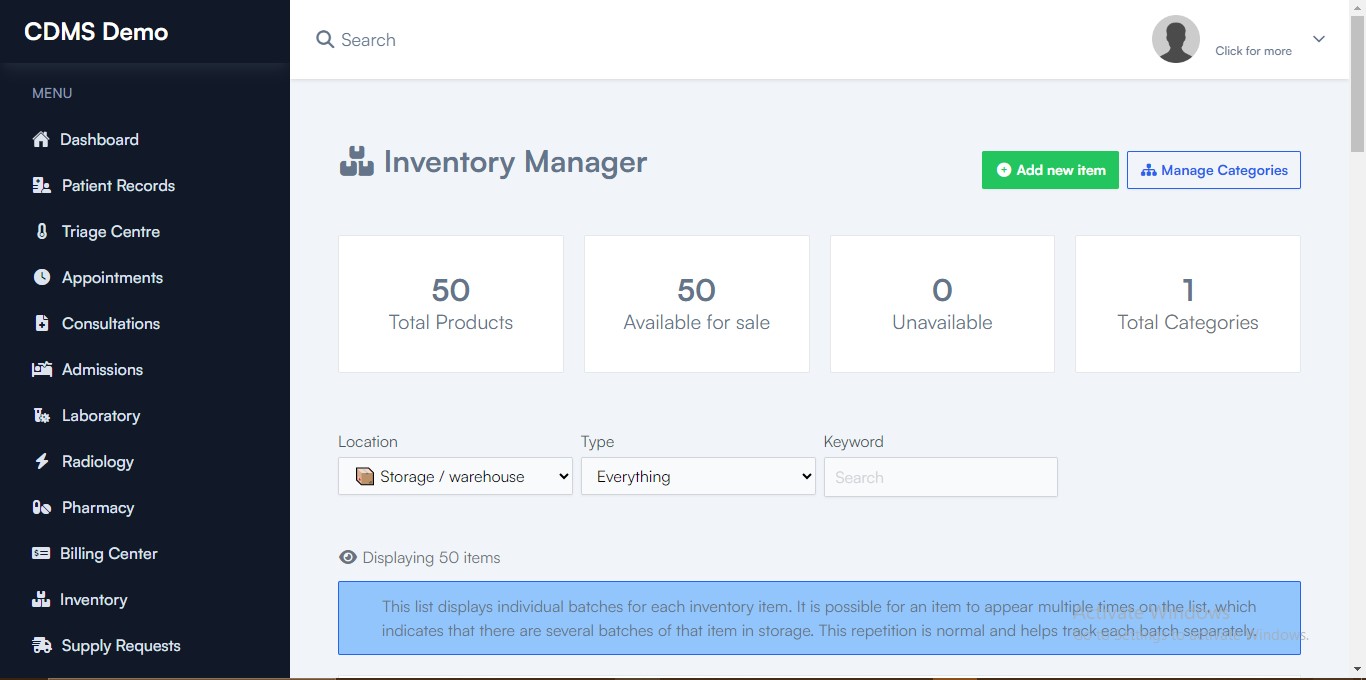
You can access category management directly from the Inventory Manager display by clicking the "Manage Categories" button, as shown below.

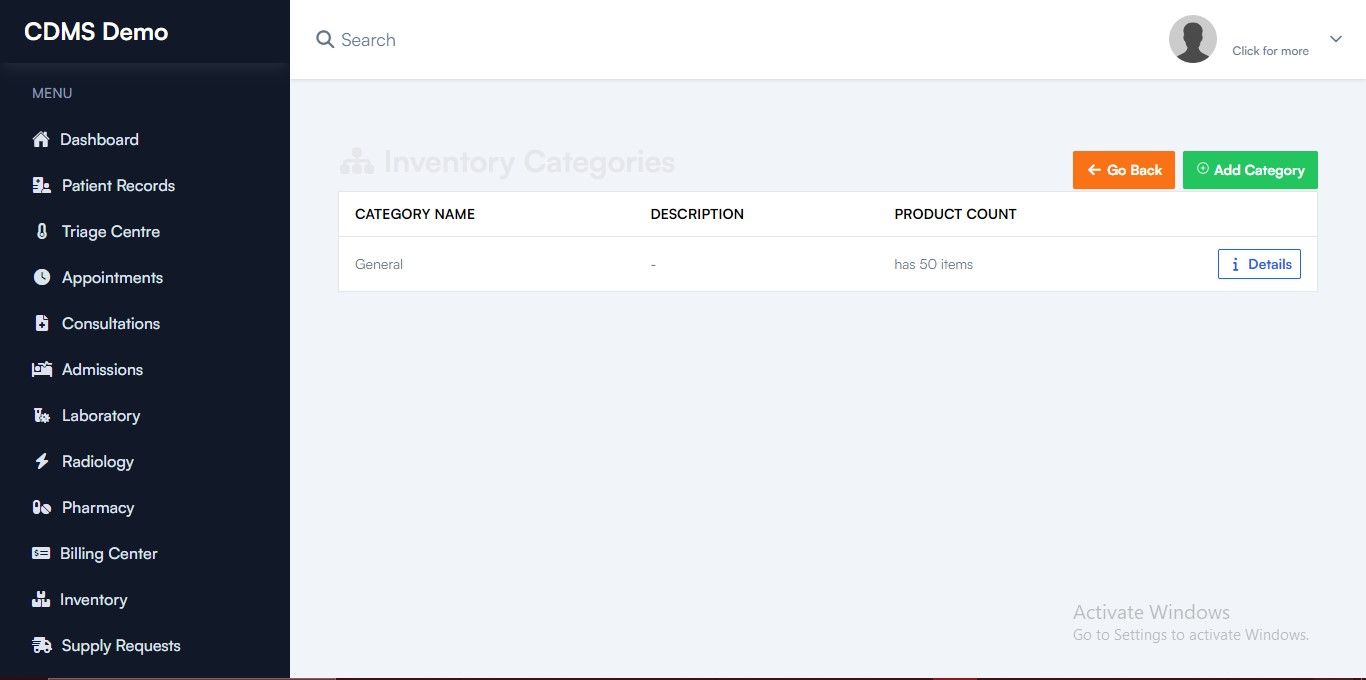
Clicking this link opens a new page that displays inventory categories. The items are shown in a table with the following columns:
- Category Name: The name of the inventory category.
- Description: A brief description of the category.
- Product Count: The number of items listed under that category.

1. Add Category
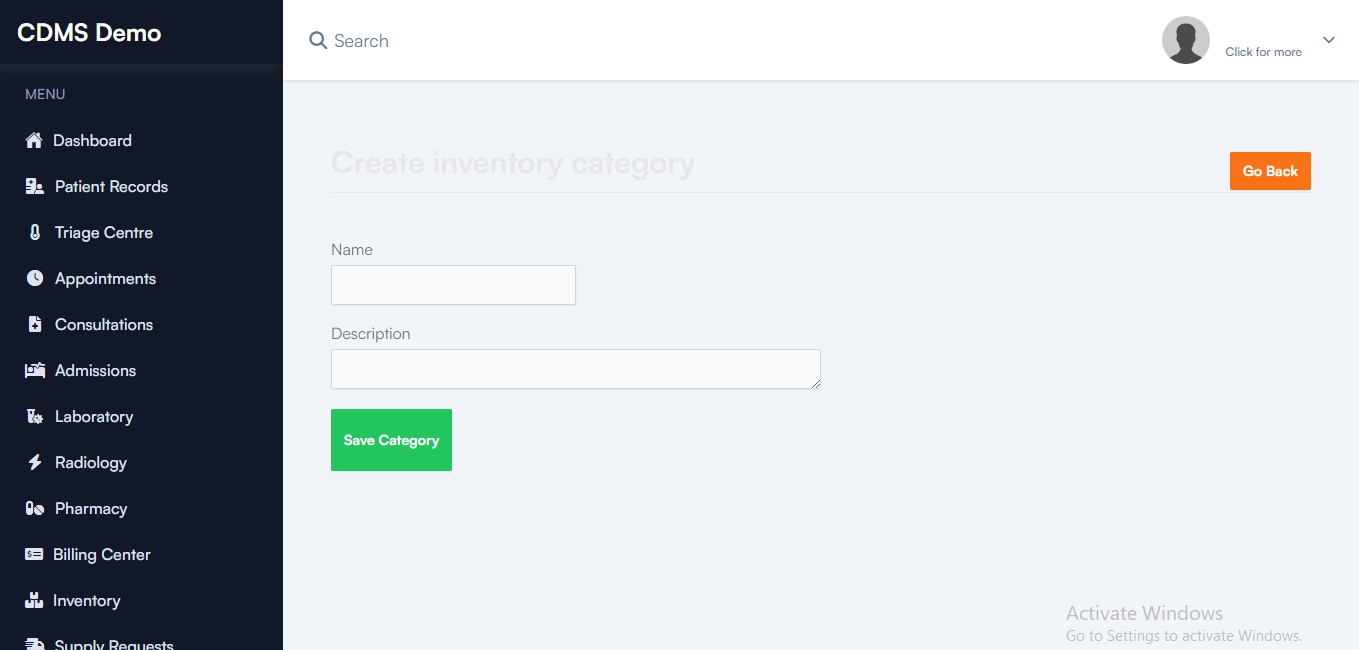
On the new page displaying inventory categories, there is an "Add Category" button as seen in the image displayed above. Clicking this button opens a form where you can add a new category. The form includes the following fields:

- Name: Enter the name of the new category.
- Description: Provide a brief description of the new category.
After filling out the form, save the new category by clicking the "Save Category" button.
2. Details
The category displayed has a "Details" button located at the far end of the category row. Clicking this button provides more information about the selected category. Refer to the first image in this page.
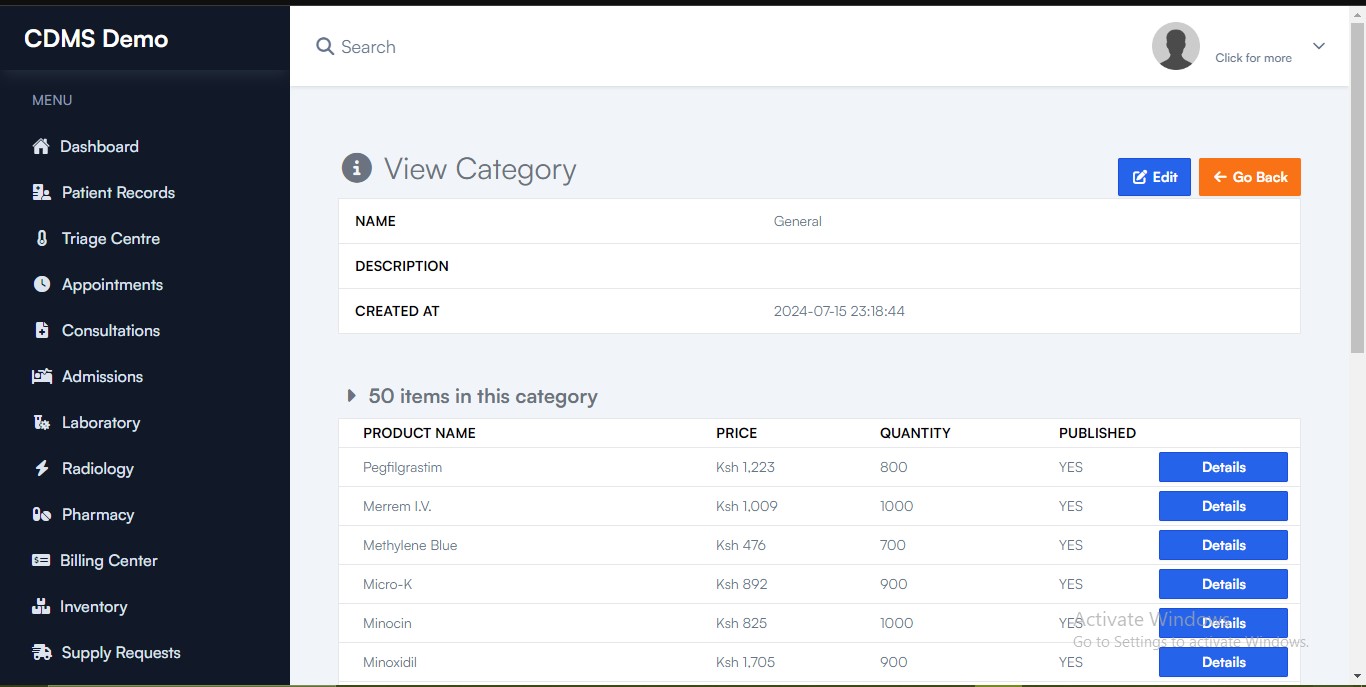
The details page shows items belonging to that category in a table format as shown in the image below.

These are the columns displayed:
- Product Name: The name of the product.
- Price: The selling price of the product.
- Quantity: The available quantity of the product.
- Published State: Indicates whether the product is published or not.
At the end of each product row, there is another "Details" button. Clicking this button takes you to the Inventory Details page.
To learn more about the Inventory Details page, please refer to the specific section or documentation provided for that page here.
You can click the "Edit" button to modify the category you are working with.
You can access category management through the Add Item page by clicking the "Manage" link next to the label "Category" in the Product Information Form.